> For the complete documentation index, see [llms.txt](https://docs.falcon.finance/llms.txt). Markdown versions of documentation pages are available by appending `.md` to page URLs; this page is available as [Markdown](https://docs.falcon.finance/resources/quick-app-guide/navigating-the-earn-tab/boosted-yield/restaking-for-boosted-yield/restaking-with-susdf.md).
# Restaking with sUSDf
Step-by-step guide for restaking sUSDf into fixed-term vaults in Falcon to earn boosted yield, with a unique NFT representing position and tenure.
### User Flow for Restaking sUSDf for Boosted Yield
**Step 1a: Navigate to the Boosted Yield Section**\
First, users locate the Earn tab on the Falcon App and select Boosted Yield from its dropdown menu.
**Step 1b: Navigate to Falcon Account Overview**\
Alternatively, users may directly access their sUSDf through the Falcon Account Overview. Clicking Boost yields under the sUSDf section will also redirect them to the restaking interface.
**Step 2: Indicate sUSDf Amount**\
Users indicate the desired amount of sUSDf they wish to restake, ensuring that they have a sufficient balance in their connected Web3 wallet.
**Step 3: Select Tenure**\
Users then select from a range of available fixed-term tenures (e.g., 3, 6, or 12 months), each with their corresponding yield APYs. The longer the selected tenure, the higher the boosted yield.
**Step 4: Restake sUSDf**\
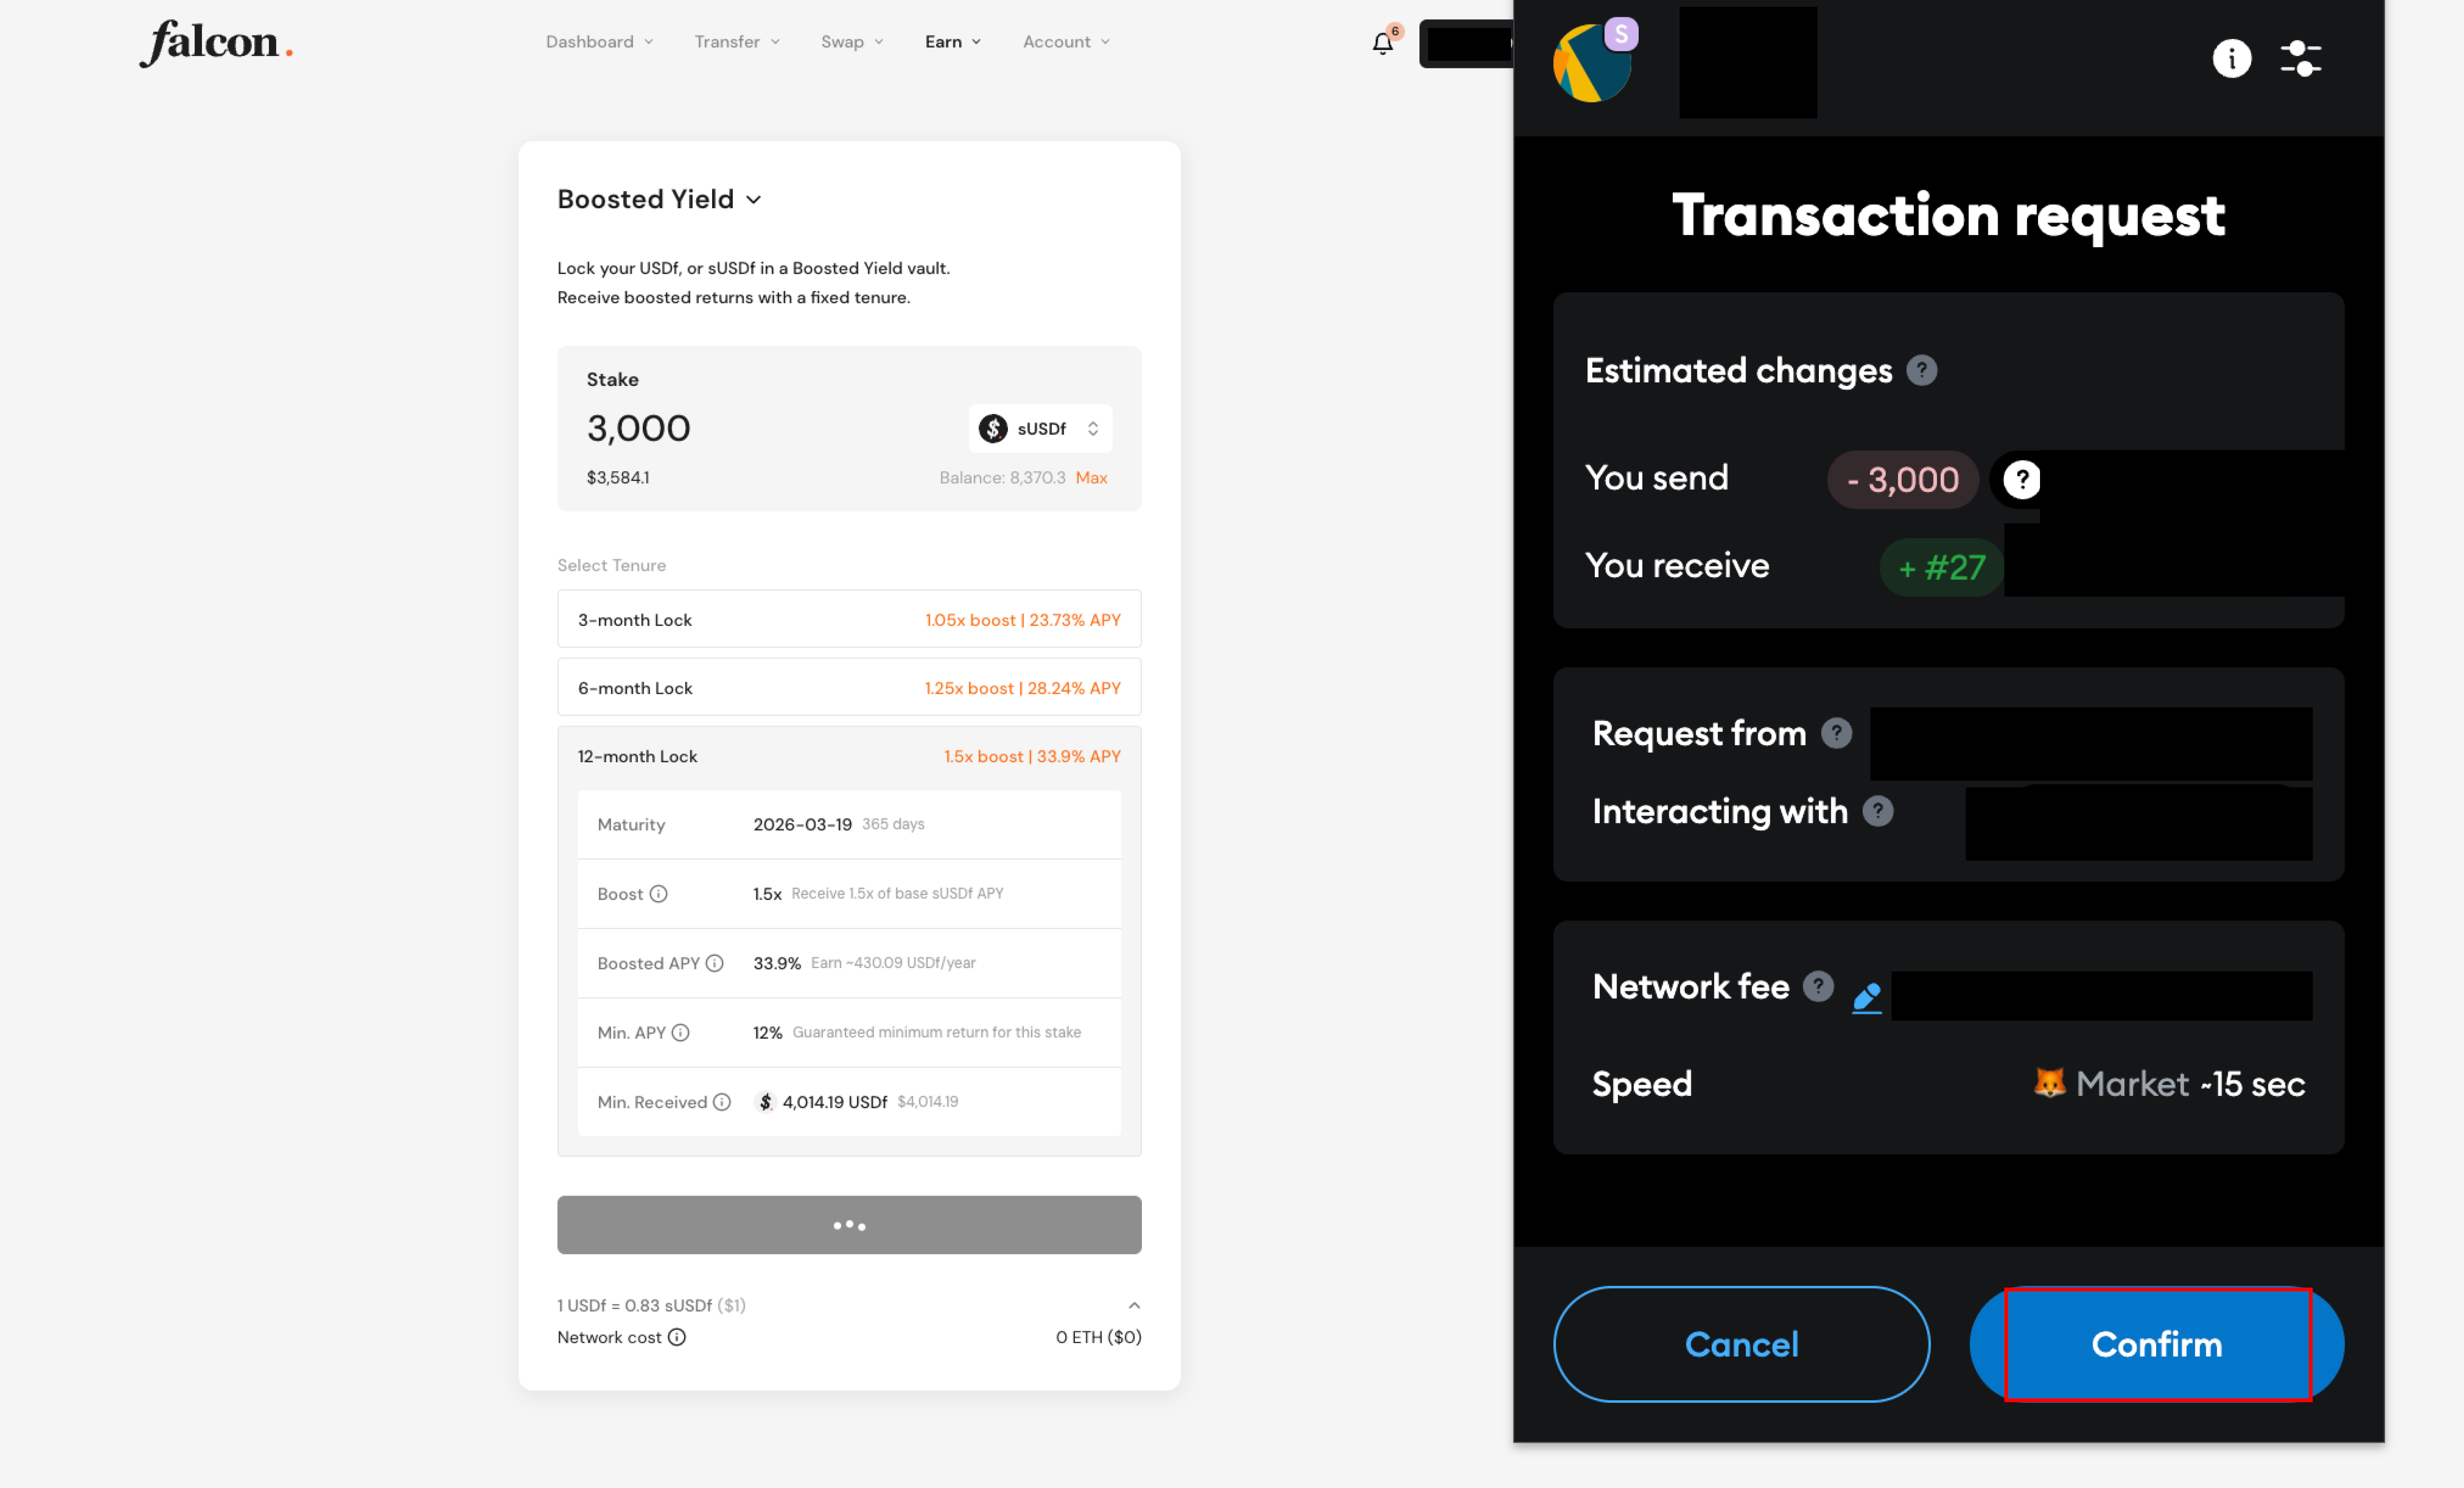
Once the amount of sUSDf is indicated and a tenure has been selected, users can initiate the restaking by clicking the Stake button. This will trigger a transaction.
**Step 5: Approve Transaction**\
Users will be required to confirm and authorize the transaction within their Web3 wallet.
**Step 6: Confirm Restaking via Falcon Account Overview**\
After restaking is finalized and the transaction is confirmed, users should confirm that their newly restaked assets are viewable under the Profile function located in the dropdown menu of the Account tab. \
Users should observe a decrease in their sUSDf balance, an equivalent increase in staked sUSDf amount, and a new ERC-721 NFT under the Boosted Yield Positions section.
**Step 7: Verify NFT Position**\
Upon successful restaking, users would have automatically minted a unique ERC-721 NFT that represents their fixed-term yield position. The NFT encodes key data such as the principal amount (in sUSDf), the selected restaking duration, and the expected maturity date.\
The NFT serves as proof of users' restaked positions and can be tracked under the Boosted Yield Positions section of the dashboard. It is transferable, enabling future utility across supported platforms or secondary markets. \
*Users can also click the shortcut under NFT to view their ERC-721 directly on its respective block explorer.*